Planning Your DIY Kitchen Christmas Tree
Embarking on a DIY kitchen Christmas tree project is an exciting way to infuse holiday cheer into the heart of your home. Careful planning is essential for a successful and visually appealing outcome. Start by envisioning the overall aesthetic you desire. Consider the existing decor of your kitchen and how the Christmas tree will complement it. Will it be a rustic, farmhouse-style tree, a modern minimalist design, or something more traditional? Sketching out your ideas and gathering inspiration from various sources, such as magazines, online platforms like Pinterest and Instagram, and home decor blogs, will help solidify your vision. Think about the size of the tree, the type of ornaments, and the color scheme that will best suit your space. Proper planning also involves setting a budget, creating a timeline, and making a list of the necessary materials to avoid any last-minute surprises and ensure a smooth and enjoyable crafting experience.
Choosing the Right Space for Your Tree
Selecting the right spot for your DIY kitchen Christmas tree is crucial for both aesthetic appeal and practicality. The chosen location should not only enhance the visual charm of your kitchen but also ensure it remains a functional and safe space during the holiday season. Avoid areas that obstruct walkways or hinder the normal flow of kitchen activities. Consider the proximity to appliances like the oven or stovetop; ensure the tree is placed at a safe distance to prevent any fire hazards. Evaluate the amount of available counter space and floor space to determine the appropriate size and style of your tree. Take into account the visibility of the tree from different angles within the kitchen and surrounding areas to maximize its decorative impact. Think about whether you prefer to have a tabletop tree on a kitchen island or a wall-mounted tree to save space.
Assessing Kitchen Space

A detailed assessment of your kitchen space is essential before you start building your DIY kitchen Christmas tree. Begin by measuring the available space where you intend to place the tree. Note the height, width, and depth of the area to determine the maximum size the tree can occupy. Consider the presence of any cabinets, appliances, or furniture that might interfere with the placement of the tree or restrict movement around it. Evaluate the layout of your kitchen, paying attention to the distance between the countertops, the island, and any seating areas. Check for electrical outlets nearby for powering lights and other decorative elements. By analyzing the space thoroughly, you can choose a tree style and design that fits perfectly and complements the overall functionality of your kitchen. A well-planned layout enhances both aesthetics and practicality. (image: kitchen-space-assessment.webp)
Considering Kitchen Traffic Flow
When planning your DIY kitchen Christmas tree, carefully consider the traffic flow within your kitchen. Your aim should be to ensure the tree doesn’t impede movement or create any safety hazards. Think about the main pathways used for cooking, serving, and accessing various areas of the kitchen. Avoid placing the tree in narrow walkways or directly in front of appliances or cabinets. Consider the height of the tree and make sure it doesn’t obstruct sightlines or interfere with daily tasks. A well-placed tree should enhance the festive atmosphere without sacrificing convenience and safety. Test different placements by simulating the movement of people within the kitchen to ensure the tree is both beautiful and functional. This will contribute to a stress-free and enjoyable experience throughout the holiday season.
Selecting Your DIY Christmas Tree Style
The style of your DIY kitchen Christmas tree is entirely up to your personal preferences and the overall aesthetic of your kitchen. There are many creative options to choose from, ranging from traditional to modern and minimalist designs. A miniature tree can be placed on a countertop, a kitchen island, or a windowsill, adding a touch of festive charm without taking up much space. If floor space is limited, consider a wall-mounted tree, which can be crafted from branches, lights, or other materials. If you have ample space, a tabletop tree can become a focal point, decorated with festive ornaments and seasonal themes. Another option is a themed tree, such as a gingerbread-themed tree or a culinary-themed tree decorated with miniature cooking tools or edible ornaments. The most important thing is to choose a style that reflects your personality and complements your kitchen decor.
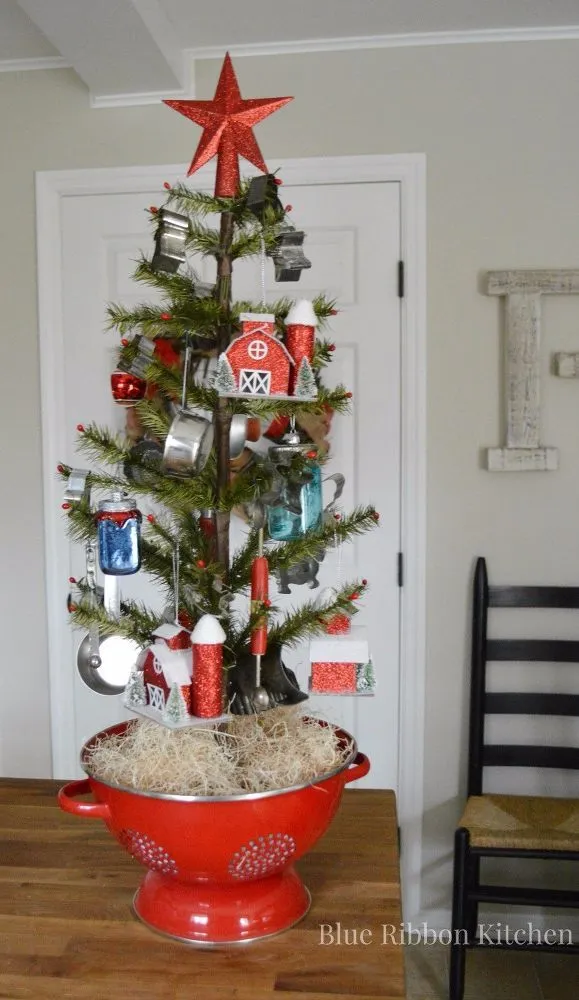
Miniature Kitchen Christmas Trees

Miniature kitchen Christmas trees offer a delightful way to incorporate holiday cheer into your kitchen, particularly if space is at a premium. These smaller trees can be placed on countertops, shelves, or windowsills, and they don’t demand as much attention as a full-sized tree. You can choose from various styles, including pre-lit artificial trees, natural mini-evergreens, or even create a DIY version using branches, ornaments, and festive decorations. A miniature tree allows you to experiment with different themes and styles, from rustic farmhouse to modern minimalist. Consider using themed ornaments, such as tiny food-themed decorations or handmade ornaments, to personalize your mini-tree and complement your kitchen decor. These trees can be placed on kitchen islands or the edges of countertops and will bring joy to the space. (image: miniature-kitchen-christmas-tree.webp)
Wall-Mounted Kitchen Christmas Trees
Wall-mounted kitchen Christmas trees provide a clever and space-saving solution, especially if your kitchen is short on floor space. You can create a wall-mounted tree by using various materials, such as wooden planks, branches, or even adhesive hooks to create the tree shape. Alternatively, you can use string lights to outline the shape of a tree on the wall. This option allows you to add ornaments and decorations without taking up any valuable floor space. Decorate the wall-mounted tree with festive ornaments, garlands, and fairy lights to match your kitchen decor. Some creative ideas include using chalkboard paint to create a tree shape, which you can then decorate with chalk ornaments, or using a pegboard to create a versatile Christmas tree display. This design is an excellent way to add a festive touch.
Tabletop Kitchen Christmas Trees
Tabletop kitchen Christmas trees are a versatile and eye-catching option, offering a festive focal point while still allowing for functional space. These trees are ideal for placing on kitchen islands, countertops, or dining tables. Consider the size and style of your kitchen when choosing the size of your tabletop tree. You can opt for a pre-lit artificial tree, a natural evergreen, or create your DIY version using branches, and ornaments. Decorate the tree with ornaments that complement your kitchen’s existing decor, such as a farmhouse-style tree with rustic ornaments or a modern tree with metallic decorations. Tabletop trees provide an opportunity to get creative with decorating themes, allowing you to showcase your personality and create a warm, welcoming atmosphere. Ensure the tree is placed at a safe distance from cooking surfaces and other hazards and is securely stable.
Gathering Materials for Your DIY Project

Before you begin building your DIY kitchen Christmas tree, carefully gather all the necessary materials. This will ensure a smooth and hassle-free construction process. Make a detailed list based on the chosen tree style and design. This could include materials like wood for the base, branches, or a pre-made tree frame, depending on your design. Consider the size of your tree when purchasing materials. Decide on ornaments, garlands, lights, and any other decorative elements you want to incorporate. If you’re constructing a tree from scratch, you’ll need materials such as wood, nails, screws, and glue. Don’t forget to gather any necessary tools, such as a saw, hammer, drill, and measuring tape. Ensure you have enough supplies to complete the project, and consider purchasing extra materials.
Essential Tools for Tree Construction
Gathering the right tools is crucial for the successful construction of your DIY kitchen Christmas tree. Your tool selection will depend on the type of tree you are constructing, but a basic set of tools is generally required. A measuring tape and a pencil will be essential for accurately measuring and marking materials. If you plan to build a tree from scratch, you’ll need a saw, such as a hand saw or a circular saw, to cut the wood for the frame or base. A hammer and nails will be needed to assemble the tree structure, while a drill and screws might be necessary for more complex designs. Consider the use of a level to ensure the tree is perfectly upright. Safety equipment, such as safety glasses and gloves, are also recommended. Having the right tools will make the construction process easier and more efficient.
Christmas Tree Base Materials
The base of your DIY kitchen Christmas tree is a vital component as it provides stability and support for the entire structure. The choice of base materials will depend on the size and style of your tree. For smaller tabletop trees, you can use a decorative pot, a wooden box, or even a sturdy plate. Larger trees might require a more robust base, such as a wooden stand or a metal frame. If you are creating a tree from scratch, consider using a piece of plywood or a similar material to create the base. Make sure the base is strong enough to support the weight of the tree and all the decorations. Decorate the base to match the overall theme of your tree, such as painting it, adding fabric, or wrapping it with decorative paper.
Christmas Tree Decorations and Ornaments

Selecting decorations and ornaments for your DIY kitchen Christmas tree is an exciting part of the process, allowing you to add personality and flair to your festive creation. Consider the overall style of your kitchen and the desired theme of your tree. If your kitchen has a rustic farmhouse style, opt for ornaments such as burlap ribbons, wooden stars, and handmade ornaments. If you have a modern kitchen, you may want to choose minimalist ornaments, such as geometric shapes, metallic balls, or simple lights. You can also add themed ornaments that relate to your kitchen or culinary interests, such as miniature cooking tools, food-themed ornaments, or gingerbread men. Balance the color scheme and ensure there is a balance of textures. (image: diy-christmas-tree-ornaments.webp)
Step-by-Step Guide to Building Your Tree
Building your DIY kitchen Christmas tree can be a fun and rewarding experience. The steps will vary depending on the type of tree you decide to create. However, the general process involves a few key stages. Start by preparing the base, whether you are using a pre-made pot or constructing a base from scratch. Next, assemble the tree structure. This could involve attaching branches to a central pole, creating a frame, or arranging materials like string lights. Once the structure is in place, you can start adding decorations, such as ornaments, garlands, and lights. As you progress, continually check the stability of the tree and make any necessary adjustments. Finally, add any finishing touches, such as a tree topper.
Constructing the Tree Base
Constructing the base of your DIY kitchen Christmas tree is a crucial step in ensuring stability and a professional finish. If using a pre-made base, like a decorative pot or a wooden box, make sure it is the right size. If you are building a base from scratch, measure and cut the material (like wood or plywood) to the required size. Assemble the base by securing the pieces together using nails, screws, or glue. If necessary, add weight to the base, such as sandbags or stones, to increase stability. Sand down any rough edges and apply paint or other decorative finishes to match your tree’s theme. The base should be sturdy enough to support the entire tree. (image: diy-christmas-tree-materials.webp)
Assembling the Tree Structure

Assembling the tree structure is the next step after constructing the base. The method will vary based on the tree’s design. For a traditional tree, start by attaching the branches to a central pole, working from the bottom to the top. Ensure the branches are evenly spaced and securely attached. If you are creating a wall-mounted tree using branches, arrange the branches in a tree shape and secure them to the wall using nails or adhesive hooks. For a more simple design, use string lights to form the shape of a tree on the wall. Always ensure the tree structure is secure and stable before adding decorations. If building from scratch, focus on a sturdy frame.
Adding Decorations and Finishing Touches
After assembling the tree structure, it is time to add decorations and finishing touches, which will bring your DIY kitchen Christmas tree to life. Start by adding lights, either string lights or individual LED lights. Arrange the lights evenly throughout the tree, from the inside out. Once the lights are in place, start adding ornaments, starting with larger ornaments. Distribute the ornaments evenly throughout the tree. Then, add smaller ornaments and other decorative elements, such as garlands, ribbons, and bows. Finish off with a tree topper, such as a star, angel, or bow. Stand back and admire your creation. (image: kitchen-christmas-tree-lighting.webp)
DIY Ornament Making Ideas
Making your own ornaments adds a personal touch and unique charm to your DIY kitchen Christmas tree. DIY ornament projects can be as simple or complex as you want, and they are a great way to involve the whole family. Consider making ornaments from various materials, such as felt, paper, wood, and even food items. You can create felt ornaments, such as stars, hearts, or festive characters. If you are looking for a more unique design, create ornaments using salt dough. For a culinary-themed tree, you can create ornaments shaped like miniature cooking tools or food items. Another simple idea is to create photo ornaments using family pictures. Get creative and have fun.
Lighting Your Kitchen Christmas Tree
Proper lighting is crucial to creating a magical ambiance for your DIY kitchen Christmas tree. The type of lights you choose, and how you arrange them, can significantly affect the overall look and feel. Select lights that complement your tree’s style and the kitchen’s decor. Options include traditional incandescent lights, energy-efficient LED lights, and smart lights with customizable features. For a classic look, wrap the lights around the branches, starting from the inside and working your way out. Experiment with different lighting patterns and colors to achieve the desired effect. Fairy lights can add a soft glow and create a magical effect, while icicle lights can add a dramatic touch. (image: kitchen-christmas-tree-lighting.webp)
Choosing the Right Lights
Choosing the right lights for your DIY kitchen Christmas tree is an important decision that impacts the overall look and feel of your tree. Several factors need to be considered when making this choice. First, consider the color of the lights. White lights can create a classic and elegant appearance, while colored lights can add a festive and playful touch. If you are looking for a versatile option, choose lights with a color-changing feature or smart lights with customizable settings. Second, consider the type of lights. LED lights are more energy-efficient and have a longer lifespan compared to traditional incandescent lights. Finally, consider the size and shape of the lights. Mini lights are a classic choice and are great for smaller trees. For a more modern look, consider using larger bulb lights.
Safety Precautions for Lights
Safety precautions are paramount when using lights on your DIY kitchen Christmas tree. Always inspect your lights before use, and discard any sets with frayed wires or damaged bulbs. Use lights that are specifically designed for indoor use. If you are using extension cords, make sure they are rated for the appropriate wattage and are in good condition. Never overload electrical outlets, and avoid running cords under rugs or carpets where they could become a fire hazard. When plugging in your lights, use a surge protector to protect them from electrical fluctuations. Always turn off the lights before leaving the kitchen or going to bed, and unplug them when not in use.
Maintaining and Preserving Your Tree
After the holiday season, proper maintenance and preservation are key to keeping your DIY kitchen Christmas tree in good condition for years to come. This involves several steps to ensure the tree is properly stored and ready for use next year. It is vital to carefully remove the decorations, lights, and ornaments. Pack each item carefully in storage boxes or containers, using bubble wrap, tissue paper, or other protective materials to prevent damage. Check the tree structure for any damage or wear and tear. Make any necessary repairs. Clean the tree, ensuring it is free from dust and debris before storing. Once the tree is dry and clean, store it in a cool, dry place, away from direct sunlight and moisture.
Proper Storage for Next Year
Proper storage is essential for preserving your DIY kitchen Christmas tree. After removing all decorations and lights, disassemble the tree structure if possible. If your tree is a real evergreen, allow it to dry completely before storage to prevent mold or mildew. For artificial trees, clean the branches with a soft cloth or brush. The best way to store your tree is in a dedicated storage container. This could be a large storage box or a special Christmas tree storage bag. If you do not have a storage container, wrap the tree in a protective covering, such as a plastic sheet or heavy-duty paper. Store the tree in a cool, dry place, such as a closet, attic, or basement, away from direct sunlight and moisture. Proper storage prevents damage and allows you to use your tree for years to come.
Keeping Your Tree Looking Fresh
To keep your DIY kitchen Christmas tree looking fresh throughout the holiday season, especially if it is a real evergreen, implement a few simple maintenance tips. If you have a real tree, make sure it is properly watered. Check the water level in the tree stand regularly, and add water as needed. Avoid placing your tree near heat sources, such as radiators or direct sunlight, which can cause the needles to dry out. Regularly mist your tree with water to keep the needles hydrated and reduce needle drop. You can also use a tree preservative spray, available at most home improvement stores. To maintain your artificial tree, regularly dust it with a soft cloth or feather duster.
Inspiration for DIY Kitchen Christmas Trees
Looking for inspiration to create your own DIY kitchen Christmas tree? Several resources can provide ideas and guidance. Browse through online platforms like Pinterest and Instagram for inspiration, searching for keywords such as “DIY kitchen Christmas tree” and “kitchen Christmas decor.” These platforms are full of creative ideas, from simple tabletop trees to elaborate wall-mounted displays. Explore home decor blogs and websites that feature holiday decorating ideas. Many blogs provide step-by-step tutorials and detailed photos of DIY projects. Visit local craft stores and home decor stores, where you can find displays and product demonstrations. This can help you get inspiration. Consider different themes, such as a farmhouse-style tree, a modern minimalist design, or a themed tree.